We've lived in our house for nine years now and we've never once touched the playroom. It was a dingy two-tone white/tan color and some of the paint was peeling off the stucco walls. Even though we both wanted to give it a makeover we never attempted because it's such a large room and there's so. much. junk in it. Now that the girls are older we are finally starting to clear out some of the toys and I woke up one day and thought, "Today's the day. We're doing it."
It took me two weekends of cleaning, painting, and cleaning again but it's now so much brighter looking and we don't cringe every time we walk in. It needs some decorations but I'm cheap so I'm just going to wait until I come across something on clearance or at a yard sale that I can't live without versus going out and spending a ton of money buying new things. We also need to do another big toy purge but they did really well the first time so I don't want to push it just yet.
Here's a before/after of the main toy wall.
We got rid of boxes and boxes of junk and I moved some things around to make it easier for the girls to find what they wanted. The bookcase on the left holds all their movies and games in one easy location instead of spread out in several rooms. I also cleaned out the plastic storage box and emptied an entire drawer of toys.
The bookcase is my favorite part of the new room. It was a loud blue color and I painted it white. Now it matches the room and looks like a brand new piece of furniture.
"Kitty Area" is another thing I'm proud of. We never use this main door and it the closet next to it made the whole area look dark and dirty so I decided to paint both doors white to brighten it up. My husband was opposed to the idea at first but afterwards he agreed it was a huge difference.
I would like to find some large pieces of art and an oversized clock to hang on the walls eventually. My kitchen is my next big reno project!
Showing posts with label crafts. Show all posts
Saturday, July 8, 2017
Wednesday, February 1, 2017
Homemade Salt Dough Ornaments
I take care of a gaggle of kids every afternoon and I'm always looking for cheap fun things to do to keep them busy. Salt Dough Ornaments were a great idea because it was a multi-day craft and they looked forward to all of the steps.
The first day we made the dough and shaped them using cookie cutters. We let every child do one and then when we had some leftover dough I let a few do some extras for the kids who weren't there that day. Make sure to use a straw to poke the hole through BEFORE you bake. And make it larger than a normal poke. Spread it around a little because the dough shrinks up a bit when baked. The hint to these ornaments is bake them LONG and LOW. A lot of recipes say for about 20 minutes at 300 degrees. I recommend going around an hour at 250 degrees. If you go too hot they start to crack a little.
The next time we were together we painted them and we let them do whatever they wanted. Some just threw the paint on (like Bug), some made elaborate designs (see Goose's cat paw and gingerbread man), and quite a few even threw some glitter on them.
We let them paint for a few days so everyone who comes at different times had a chance. Then we used Mod Podge to seal them and added some cute ribbon.
I think we've made some of these every year and the girls always love them!
Wednesday, January 25, 2017
Christmas Decorations
I'm more of a handmade kind of decorator. I don't like a lot of junk and I just don't see the point in keeping something unless it has nostalgia attached to it. That's why a lot of our Christmas decorations are things that I remember my mom using when I was younger or stuff the girls have made me over the years.
Every year we put these signs up on our kitchen cabinets. I love seeing their happy baby art and I'm going to be really sad when they get too worn out to use. I've already had to stop putting out some stained glass Christmas tree ones and I missed them this year.
Not even our fridge is safe from Christmas decorations. I have been collecting holiday magnets for years and seeing them all out every year is one of my favorite things!
Our Christmas tree in the girls playroom.
I saw someone on Instagram use a black Christmas tree as a Halloween tree and I loved the idea so I made sure to buy one at the beginning of the holiday shopping season. So we now have two Christmas trees. In the beginning I didn't want two trees but by the end of the first night we were all in love with the new tree. It made our living room so homey and perfect. It was decorated with all the cast-off ornaments we couldn't fit on our old tree so it's a little bare here.
.
.
Thursday, January 5, 2017
Homemade Christmas Ornaments
We love making homemade ornaments for our tree every year. There are usually several made at school or in their free time but we try to always make one together for our tree and grandparent presents.
Over the years we've made several new ones and several repeats. Here's some of my favorites:
Of course you have the gingerbread and salt dough ornaments. They're probably the big classic homemade ornaments that everyone makes at least once. We do them all the time and love them.
Another variaton is the cinnamon ornaments. This one was one I made when I was in grade school and my mom has kept all these years.
My favorites so far is probably these cute buckets of snowballs. I bought tiny buckets from Hobby Lobby and all we did was glue some cotton balls in and decorate them. Super easy but so cute.
The first ones we made together were these popsicle stick snowflakes. I glued them into snowflake shapes and gave the girls piles of buttons and glitter and let them go crazy.
We tried these yarn ones a couple of years ago and even though we had a difficult time trying to figure out how to do them I still think they turned out sweet.
This year Bug did a melted snowman with hot glue and buttons. We started a bottlecap snowman but it never was finished in time for Christmas :(
Saturday, September 17, 2016
Oobleck
My girls love Oobleck and we've made it a couple of times in the past. Bug has been asking me to make it again so I whipped up a batch and they took it outside and played with it until it fell apart.
OOBLECK
1 cup water
1.5 cups cornstarch (more if needed)
And that's it! We added some food coloring to ours to make it pretty but it's not necessary to enjoy it.
I made them take the bowl outside and told them they could do whatever they wanted with it. Needless to say they both were practically covered by the time they finished.
They asked to make it again the next weekend and this time we made a pretty green color.
The more you play with this the drier it gets so you might want to have a cup of water handy to rehydrate it occasionally. My girls enjoyed using it as chalk when it started to dry out.
They made so much of this that we ran out of cornstarch!
Friday, March 11, 2016
Ducktape Bookmarks
My girls have become obsessed with all things ducktape lately. They have made me fashion wallets and bookmarks so far. So when I saw a roll of Star Wars ducktape at Dollar General for only five dollars I knew it had to come home with me for a project.
These bookmarks aren't anything special but it was something fun for me to do for them and now they have one-of-a-king Star Wars bookmarks!
I took a sheet of white cardstock paper and placed ducktape down the length I wanted my bookmark to be. I lined up the other side as carefully as possible and cut them out. At first I really wanted to use decorative craft scissors to make the edges pretty but the stickiness of the tape detoured that plan so these are all boring straight-edged. I cut around the bookmark so that it was as even and straight as possible on both sides.
After that you just take a hole punch to the center of one end. I found that punching two holes side by side made the garland fit a little better.
I bought this pretty silver tinsel also at Dollar General in the Christmas clearance section for just thirty cents a roll. I thought it matched the spacey theme of the bookmarks and it just looks fun on them.
Now the three of us have cute new bookmarks!
Saturday, February 20, 2016
Happy Birthday Bug!
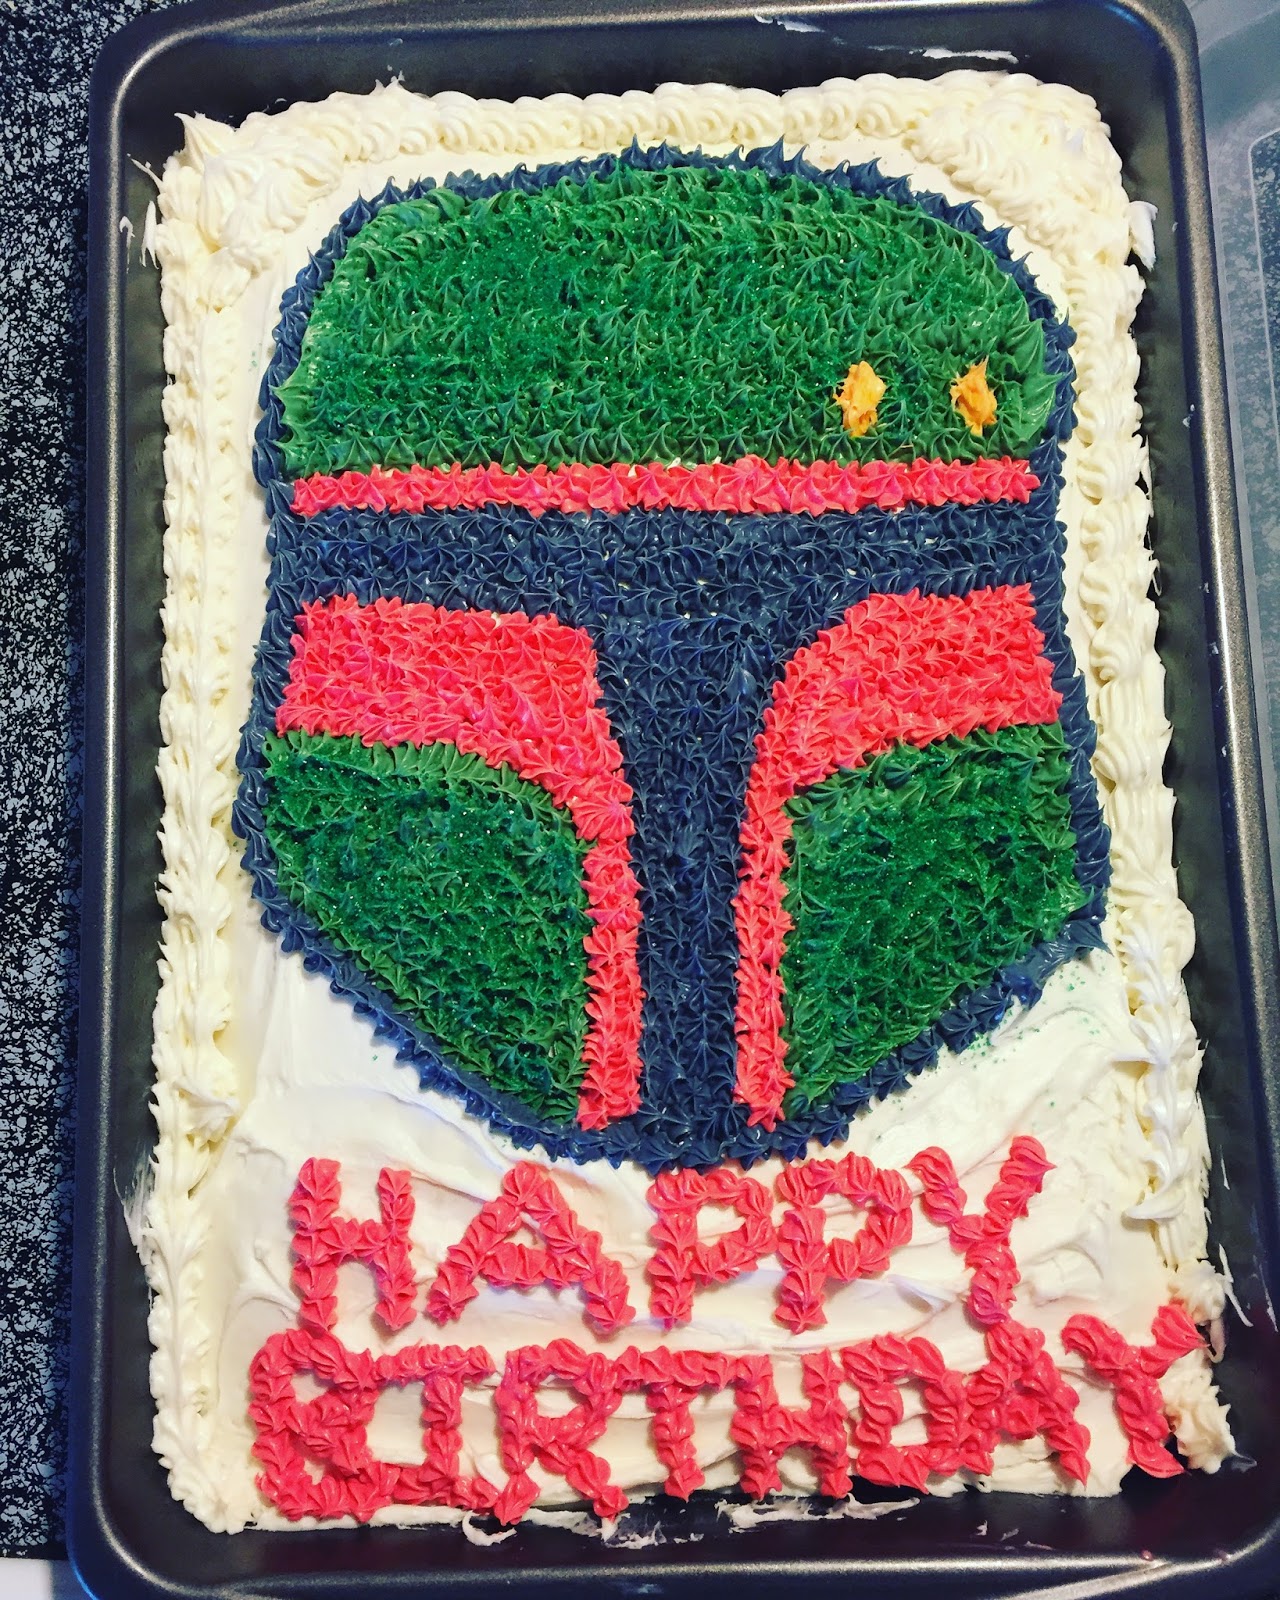
It was recently Bug's birthday and every year they get to pick what kind of homemade cake they want. This year she picked Boba Fett which came as no surprise to anyone who has ever met her. Superman may be her soulmate but she's been having a love affair with Boba since around Halloween.
I worked for about two hours on this and it was nowhere near perfect but she absolutely loved it and said it was her favorite cake ever.
I love her sweetness, her smile, the gap in her teeth, her crazy hair, the way her eyes are swollen in the mornings, the love notes she leaves me all over the house, how she thinks her older sister walks on water, that she's always up for an adventure, her devotion to her raggedy stuffed cat she's had since she was a toddler, I love everything about her. My heart is full.
Monday, October 5, 2015
Nail Polish Coffee Mug
I've seen this craft everywhere lately and wanted to try it since I love coffee mugs and I have been adding a lot to my collection lately.
Since it's almost Halloween I really wanted to try a themed mug so I bought orange and black nail polish to try.
What you need:
-White mug (I bought mine for $4 at Wal-Mart but I think going to a yard sale or Goodwill would be a better bet)
- Painters tape
- Nail polish
- Deep bowl
- Sealer (next time I'm going to look for a spray sealer instead of this one because it made the cut super slick)
Fill the bowl with water and tape around the rim of the cup. You don't want polish or sealer where you put your lips. Drip however much you want of each color into the water. Do this quickly! It starts to firm up after just a few seconds. Dip the mug into the water being careful not to get any inside. Pull it up and turn it upside down to dry. I let mine sit for a few days just to be extra-careful. Once it's dry cover it with your sealer and peel the tape off. Make sure you let it dry a few more days before giving it a good handwash and always continue to handwash every time you use it.
As you can see the paint was lighter on the sides because I dipped it at a tilt so they didn't get much color but I love it like that. I love all the layers and colors it made.
The downside to this craft was that when the mug is filled with hot water the nail polish smell continued to stink up the room and I could not stomach trying to lift it to my lips to drink. So to solve this problem I would continuously fill it with water every time I used my Keurig. I'd turn it on, fill it up with the largest setting, set it off to the side until it cooled, and then drink my normal coffee out of a different mug. After a week or so of doing this two times a day the smell disappeared.
Now I have a super cute and cheap Halloween coffee mug to only bring out once a year and cherish!
Tuesday, July 14, 2015
Bug's New Dollhouse
My mother is the queen of sending random things to our house that she doesn't want anymore. Most of the time I put it in a yard sale or discreetly throw it away but I had high hopes for this old-fashioned country shelf.
She had it hanging up in her kitchen with matching themed decoration's on it but I thought it would look cute hanging in Bug's room. One can of black spray paint might not have been enough. It probably needed two, but honestly Bug doesn't care that much if it's perfectly painted and if she's happy then I'm happy.
It's hung pretty low to the ground so that it's just her size to move dolls around and decorate it however she wishes. She loves her new dollhouse and has been excitedly telling me all the stories her and Mini Kitty will act out with it.
Monday, June 22, 2015
Library Bags and Bug's Journey to Being a Bookworm
My oldest daughter has always been a voracious reader. She pretty much taught herself how to read when she was four and she hit the ground running and never looked back. Bug took a little longer to fall in love with books. She still would rather have mommy read her a book before bed than have to do it herself. The unfortunate part for me is that she chooses the most boring books ever for us to read together. There are only so many Mary-Kate and Ashley Olsen books that I can take before throwing my hands up and screaming "Enough!"
So our new rule for bedtime reading is that we take turns picking the chapter book. I pick one (usually I stick to classics like Pippi Longstocking or Little House on the Prairie) and when we finish she gets to choose one (almost always an Olsen one, why so many Olsen books in my house??). I think that actually helped to jump-start her reading more on her own because she had so many books that she was interested in that I refused to read to her. The only way to find out what happened was to read them herself and for the last couple of weeks she's been a solo reading monster! She discovered she loves The Rescue Princesses, The Guardians of Ga'Hoole and Weird School and so many more standalones and new series are being happily discussed in our house lately. We've made two library trips in the last week and she's came home with handfuls and is powering through them at the rate of about one every two days!
***
I was cleaning my closet out and found these two plain bags that I bought years ago with big plans to do something for the girls with and never got around to it. I bought a couple of pretty iron-on patches for each girl and raided my craft box for another stack of smaller patches and let them choose which, if any, that they wanted me to put on. Then when the patches were finished I let them go completely wild with Goose's Sharpie collection. I know fabric markers would have worked better since I've discovered from personal experience that Sharpie's smudge in the wash, but I didn't feel like buying any and I don't have any plans to wash these so I figured it wasn't a big deal.
Bug wanted to use as many patches as possible and as many designs as she could fit on her bag.
Goose was a little more reserved, just drawing a few simple designs on her bag. I love how their personalities really shine through how they designed!
(the white blocks are where they wrote their names so I marked them out of the pics)
Now my sweeties have their own bags to pack with as many library books as they can hold!
Thursday, March 12, 2015
Kracie Popin' Cookin'
Goose received a box of Kracie Popin' Cookin' sets for Christmas and it was her favorite gift this year. She's been asking for them for months now. There were ten different sets and she's been burning through them since she got them.
First up was the ice cream cones. These actually didn't taste that bad but the strawberry flavor was a little medicine-like. We all four got our own and she watched each of us individually to make sure we ate the entire thing.
Donuts were a little more involved and it was a fun little 30 minute project one morning. While a gummy donut doesn't sound very appetizing I was still able to swallow it down relatively easy.
That was where the decent tasting kits ended. And it all was because of hamburger day. Imagine chewing a gum that tastes like a hamburger. These were cute as could be and she absolutely adores making them but the taste was so bad that none of us could eat ours.
This little cake took her ages to decorate and she plated it up and presented it to us so proudly. I love her little creative heart!
We're all out of the kits and she's already asking if she can get another box for next Christmas!
Tuesday, December 30, 2014
Yarn Ornaments
I know this is too old to be of use but we got a late start this year since I was so sick throughout most of December. As soon as I got off work I would nap until the girls came home and then it was homework/food/showers/storytime/dishes/laundry all the way to bedtime at around nine.
So these were finished with just one day to spare but I think they did a great and creative job on them!
I see these a lot with cardboard but since I didn't have any that was thin enough I used cardstock. I traced two circles on each one using the bottom of a plastic Happy Meal bucket. We made six so each girl had three to decorate.
The girls painted whatever they wanted on one side. Bug's are the brightly colored three and Goose chose blue and gray shades to match her white yarn. Her gradiated one is so pretty and it took her ages to mix all those individual colors!
I laminated them to make them sturdier then cut small slits evenly around them. Bug didn't want to do a lot of confusing work so she told me to stop after eight. Goose decided to brave more than that but I think by the end she wished she had stuck with eight, too.
We wrapped the string all the way across then started to move to the right with each turn. I let them have complete control so they're not perfect stars like most of the Pinterest example ones were, but I love them all the same.
Subscribe to:
Posts (Atom)